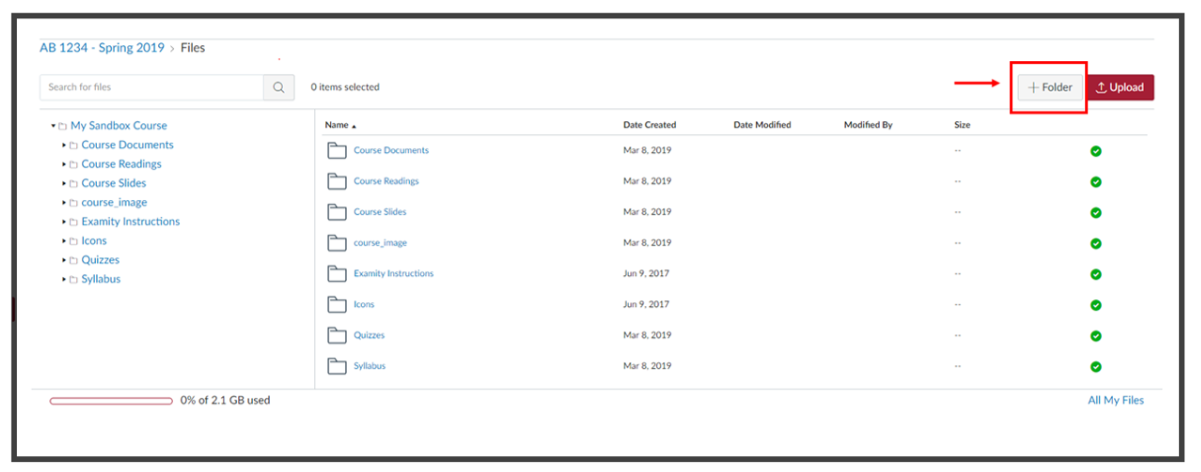
Organizing Files
- Organize all files prior to uploading to your Canvas course.
- Save files in folders according to your course structure.
- If you are organizing your course by weeks, create a folder for each week with all content needed (e.g. Readings, assignment instructions, quizzes, tests, guides, etc.)
- You can also separate documents according to subcategories like Readings, Slides, Assignments, Syllabus, Images, etc.
- Select "+ Folder" from the top-right corner of the Files page and name the File you are creating to add a folder to your Files.
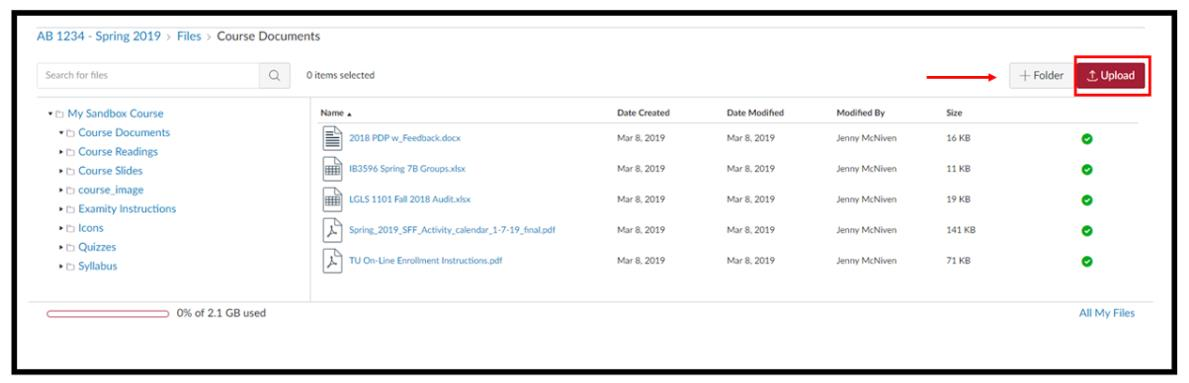
Uploading Files
It is important that you keep organization in mind when you are uploading content to
your Canvas course. Create folders for your content according to your course structure
(i.e. materials needed for each week organized by “Week”). Upload files directly to the
folder it pertains to
- Login to Canvas and select your course from your dashboard.
- Select “Files” on the left sidebar menu in your Canvas course.
- Select “Upload” in the upper right corner of the page OR Select the folder you wish to upload to and then select "Upload."
- Browse your computer for the file you would like to upload and select "Open."
- Upload multiple files at once by selecting the name of the first file and holding down the “Ctrl” key (PC) or “Command” key (Mac) on your keyboard. Select the next file you would like to add while holding the “Ctrl” key (PC) or “Command” key (Mac).
Canvas Guides: Using Files in Canvas