- Pages are a great way of sharing content with your class. Pages can link to items in your Canvas course plus outside sources like websites.
- You can insert images, graphics, and videos and customize text in the Rich Text Editor of a Page.
- You can also create a personalized home page for your Canvas course.
Course Content/Getting Started
- We recommend uploading/organizing all files and images you plan on linking in your course prior to creating your pages. You can upload from the editing page, but you will be able to organize them more effectively from the files tab.
- Once your files are organized, go to the "Pages" tab on the left-hand navigation panel and select "View all pages" from the top of the screen. Create or select the page you would like to work on.
- Note: If you work with an Instructional Designer or Course Coordinator, they will have access to pre-made 15 week Canvas templates, or prior offerings of the course in Canvas that you may be able to use as a starting point for your Canvas course.
- Select "Edit" from the top-right corner of the page and begin populating the Rich Content Editor with your desired content.
- Tip: Clearly write or label the name of everything you want to link. For example, “Read: Article 1 or Post: Discussion Board 1.” Simply clicking on a file adds it with the file name as is, which can be confusing and messy for the students.
- Lay out your page in a way that will make sense and clearly organize and present the content. We recommend organizing content by due dates.
Using the Rich Content Editor to Add Content to Pages
The Rich Content Editor includes the following: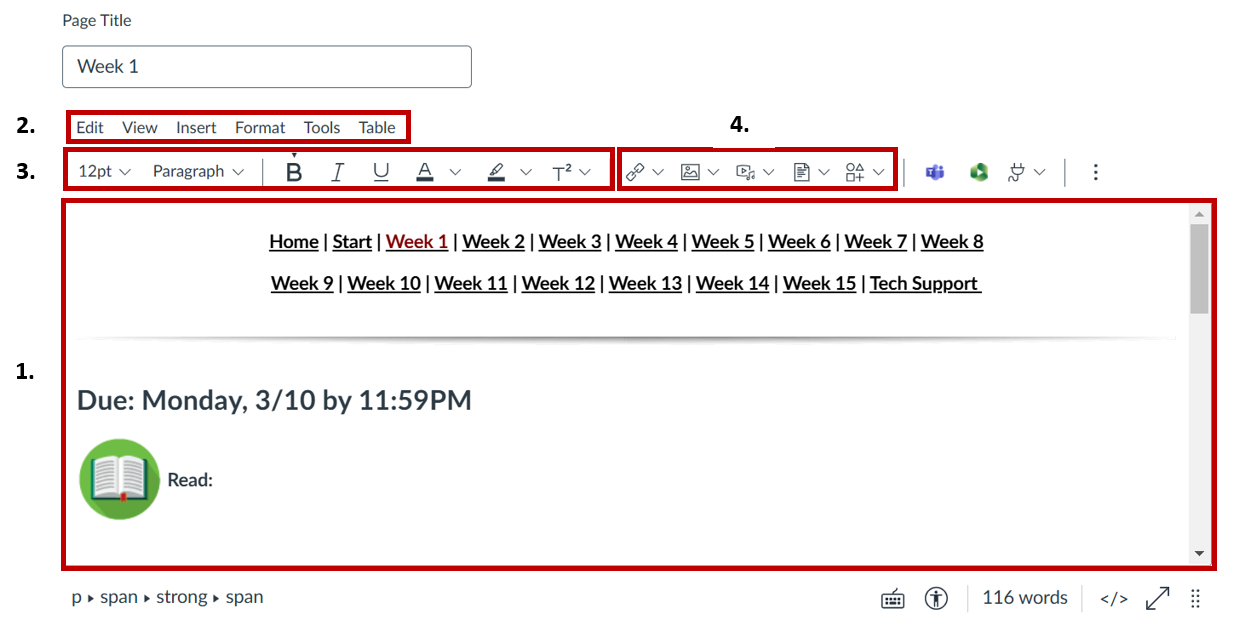
- The Content Editor – you can add and preview the page content
- Menubar – you can use the menu options to format the page
- Toolbar – you can quickly format text
Toolbar – add links, images, video, files, or make an icon
In the Toolbar you can insert links, images, media, and documents, open external tools supported by Canvas such as YouTube, Google Apps, and more, format paragraphs, clear formatting, add tables, insert an equation, and embed media

The four main Toolbar buttons utilized in editing a page are the above. You can link content on a page such as announcements, assignments, discussions, and more within your Canvas course.
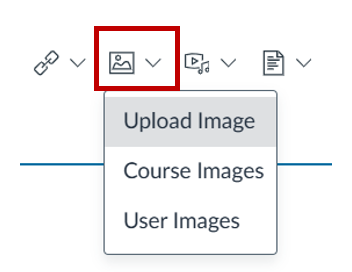
Inserting Images
You may upload an image from your computer, select from course images, or repurpose images from your Canvas account by selecting user images. To upload an image from your computer, select Upload Image. To insert an image from the Files folder, select Course Images.
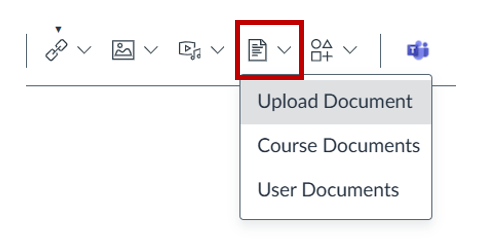
Inserting Documents
You can upload documents by selecting the document button and choosing from the drop-down options. We recommend adding documents to the Files tab first for ease of access. To insert the document:
- Highlight the text that you want to link to the content from within the Rich Content Editor.
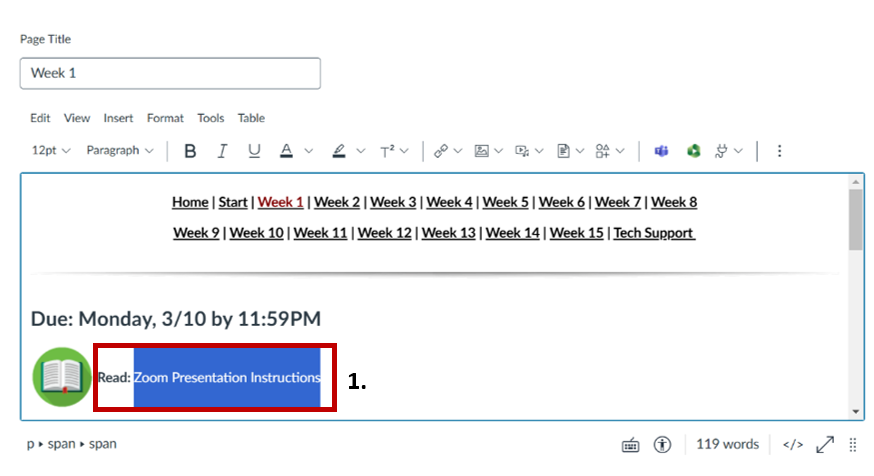
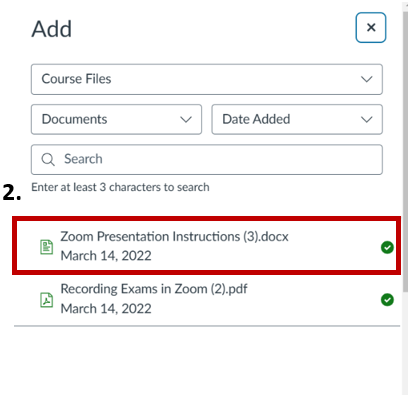
- Select the file from the right-side drop-down menu to link on the page.
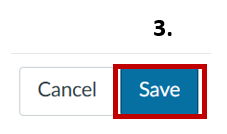
- Scroll to the bottom of the page and select “Save"
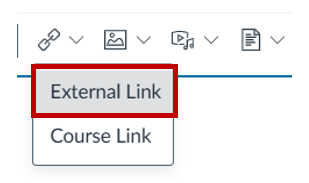
Inserting External Links
You may add external links to websites on pages (such as links to a YouTube video, podcast, or the Fox Video Vault).
Highlight the text that you want to link to the content from within the Rich Content Editor before adding the link.

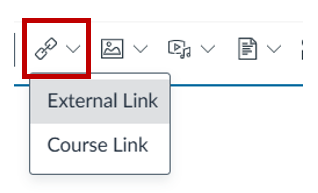
From the Toolbar, select the link icon, external links and insert the desired link.
Select “Done” and the link will be added to the Content Editor as a blue link.

Scroll to the bottom of the page and select "Save"
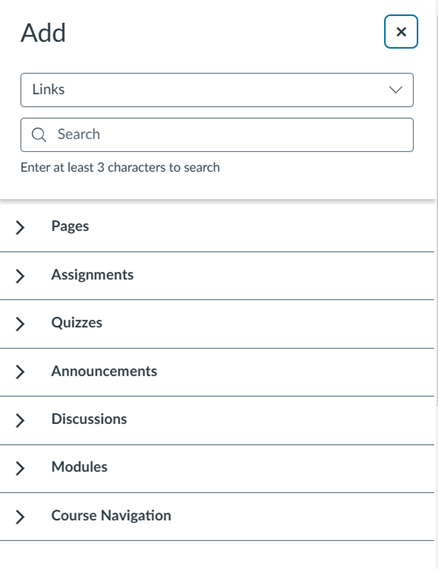
Inserting Course Links
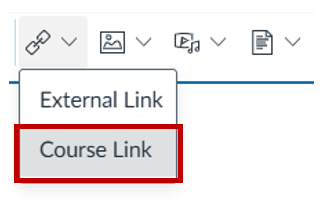 You may add links to pages, assignments, quizzes, announcements, discussions, modules, and more. Highlight the text that you want to link to the content from within the Rich Content Editor before selecting the appropriate content. From the Toolbar, select the link icon, course links, then select the desired course link (pages, assignments, quizzes, announcements, discussions, modules, or course navigation). Once selected, it will be added to the content editor. If it shows as a blue link within the Content Editor, then the link has successfully been added.