To Get Started
- Go to zoom.temple.edu
- Select “Sign In”
- Select “Setting” on you Zoom navigation
- Scroll to the “In Meeting (Advanced)” options and select the Breakout Room radio button.
- Check the box to “Allow host to assign participants to breakout rooms when scheduling”
Pre-Assigned Breakout Rooms
(if you have created your sessions through Canvas)
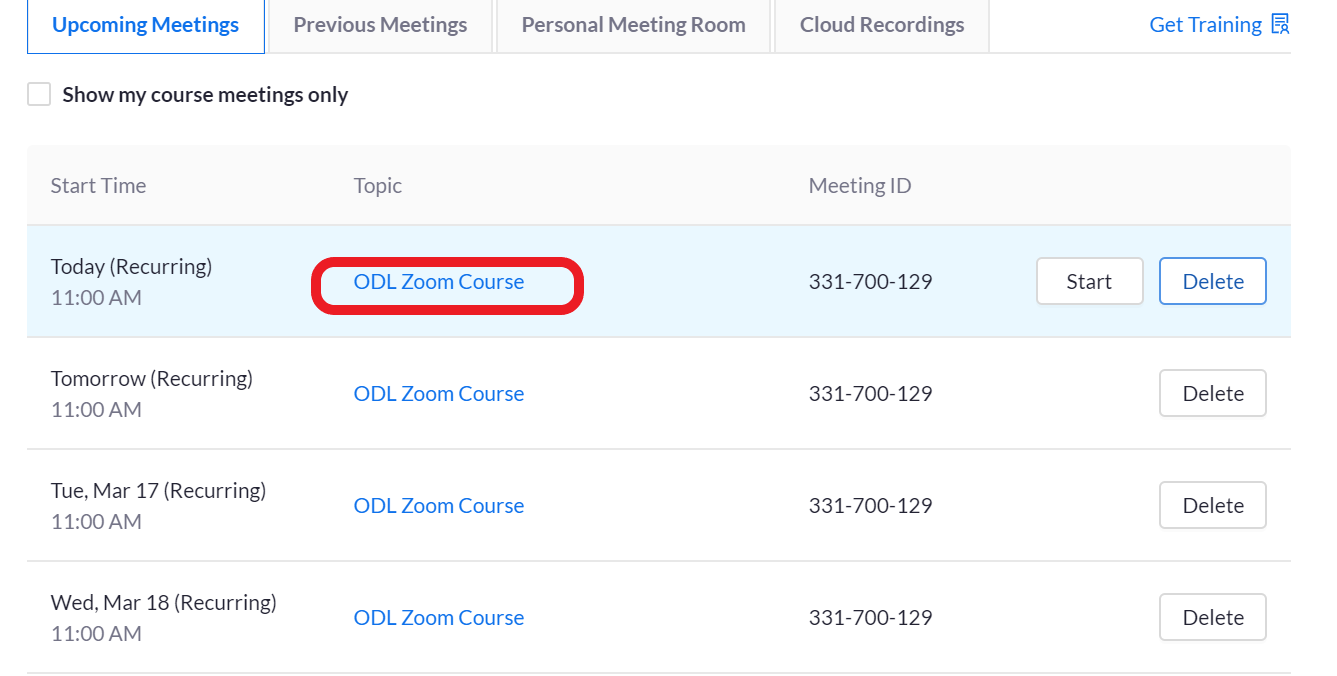
- Log in to Canvas and select “Zoom” from the Global Navigation Menu (far left sidebar menu).
- You should see the list of sessions you scheduled for you class listed
- Select the first “Topic” link under your scheduled sessions.
- You will be taken to your session’s information page, scroll to the bottom of the page and select “Edit this Meeting.”
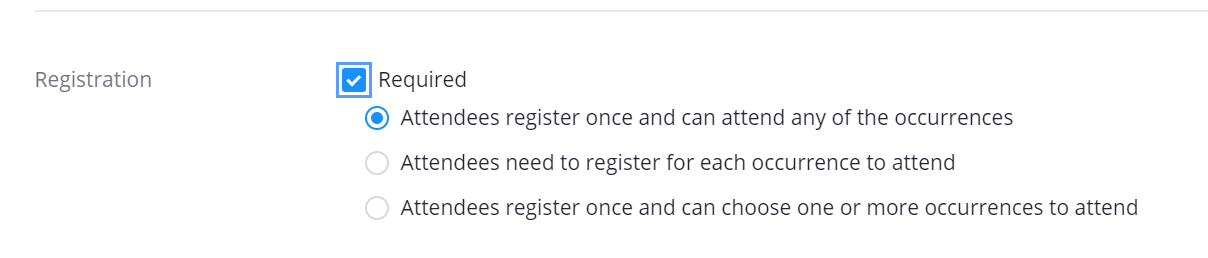
- Select the check box for “Registration”

- Select “Attendees register once and can attend any of the occurrences”
- Go to the bottom of the page and click “Save”
View Registration List
Once your students have registered, you’ll need to the full list of registrants to pre-set your Breakout Sessions
- Go to zoom.temple.edu
- Select “Sign In”
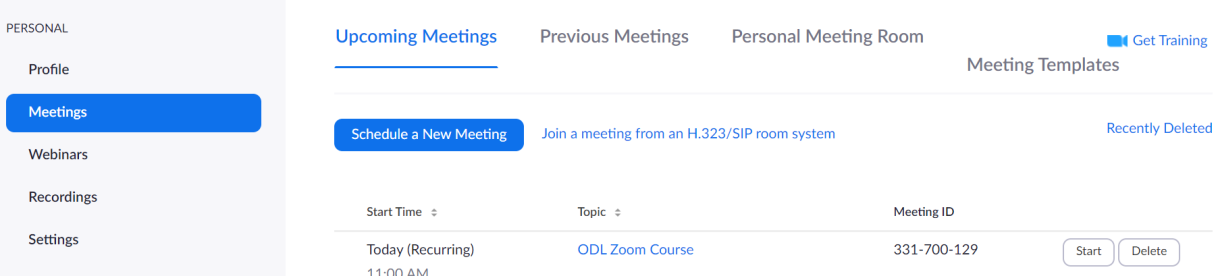
- Select “Meetings” on you Zoom navigation to left
You will now see all of you scheduled sessions from Canvas - Select the first “Topic” link under your scheduled sessions. You will be taken to your session’s information page.
- Scroll to the bottom of the page and select the “Registration” tab
- Select “View” to the right
Use this list of email registrations to create your pre-assigned breakout rooms
Note: You will now need to open a new tab in your browser to assign the registrants to your Breakout Sessions
Add Students to Pre-Assigned Breakouts
- Now, go to zoom.temple.edu
- Select “Sign In”
- Select “Meetings” on your left Zoom navigation
- You will now see all of you scheduled sessions from Canvas
- Select the first “Topic” link under your scheduled sessions. You will be taken to your session’s information page.
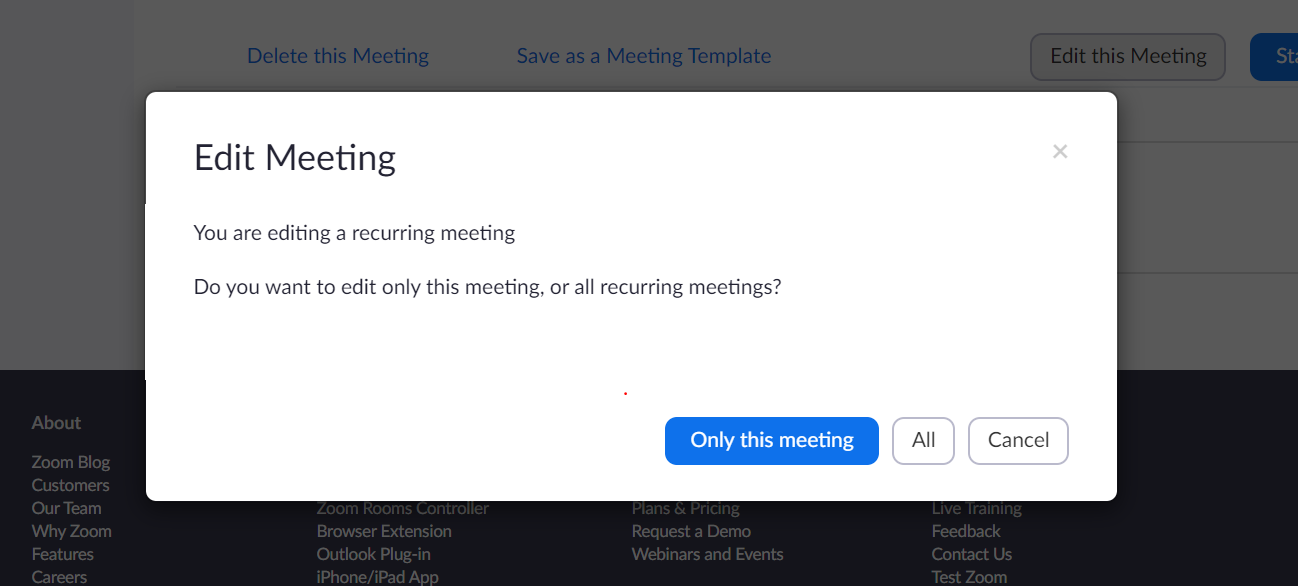
- Scroll to the bottom of the page and select “Edit this Meeting.” You will be prompted with the pop-up box below.
- Select “All”
- You will now see “Breakout Room pre-assign” as an option
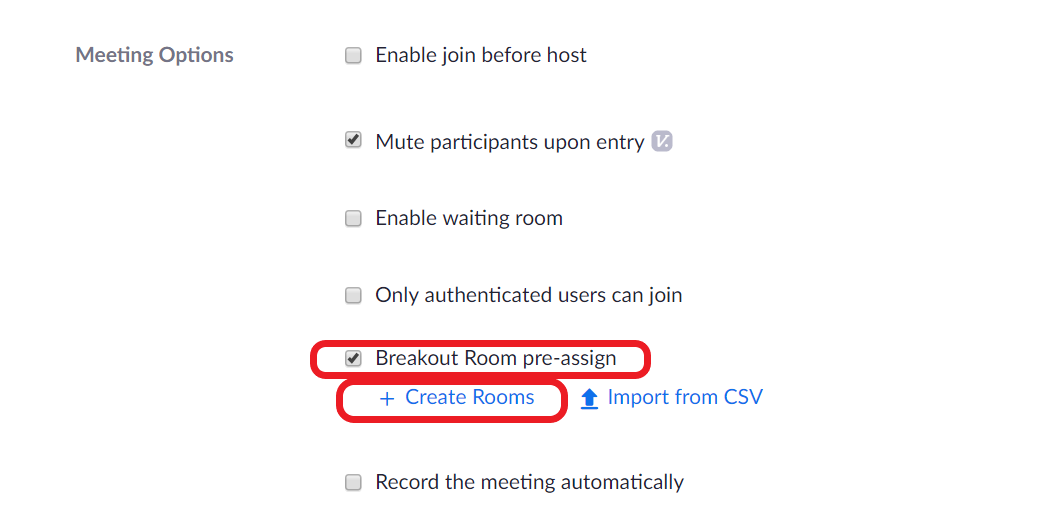
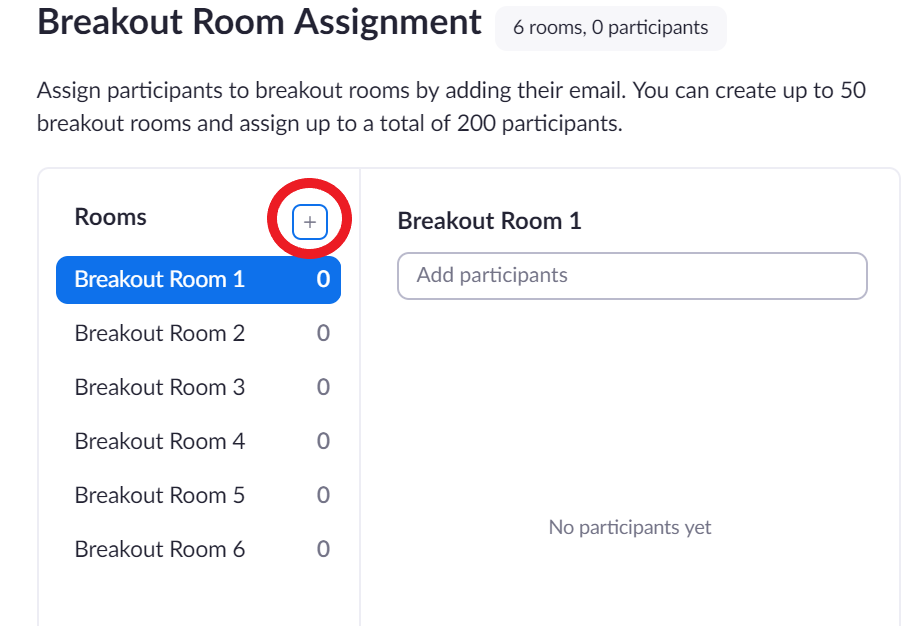
- Select “+ Create Rooms”

- Select “+” to add the number of Breakout Rooms that you would like
- In each room you can add a participant by email
- It is best to look at the registration list for this and enter individually each email your students registered with (below are instructions to view your registration list)
- When you are done imputing your student’s emails, select “Save”
Pre-Assigned Breakout Rooms
(if you have created your sessions through the Zoom site)
- Go to zoom.temple.edu
- Select “Sign In”
- Select “Meetings” on you Zoom navigation to left
You should see the list of sessions you scheduled for you class listed - Select the first “Topic” link under your scheduled sessions. You will be taken to your session’s information page.

- Scroll to the bottom of the page and select “Edit this Meeting.”
- Select the check box for “Registration”
- Select “Attendees register once and can attend any of the occurrences”
- Scroll down and select the check box for “Breakout Room pre-assign” as an option
- Select “+ Create Rooms”
- Select “+” to add the number of Breakout Rooms that you would like
- In each room you can add a participant by email
- It is best to look at the registration list for this and enter individually each email your students registered with (above are instructions to view your registration list)
- When you are done imputing your student’s emails, select “Save”