*Please Note: Due to the university-wide Zoom recording retention policy, all student-created recordings older than 30 days will be deleted. If you share your exam cloud-recording link with your professor, please also download the recording to your computer as a precaution.
Creating a Zoom Session for an Exam:
- Go to zoom.temple.edu
- Click “Sign in”
- Select “Meetings” on the Zoom navigation (to the left)
- Click “Schedule a New Meeting”
- Enter the “Topic” of your meeting as “2101 Midterm”
- Input “When” the session is (Date & Time)
- Input the Duration (optional)
- Click “Save”
Starting your Zoom Session:
- When you are ready to start the session, log into Zoom
- Click “Start” to the right of your session
- Select “Join with Computer Audio”
- “Test speaker and microphone” to insure your speakers and mic are working
- Select “Start Video”
- Select “Unmute”
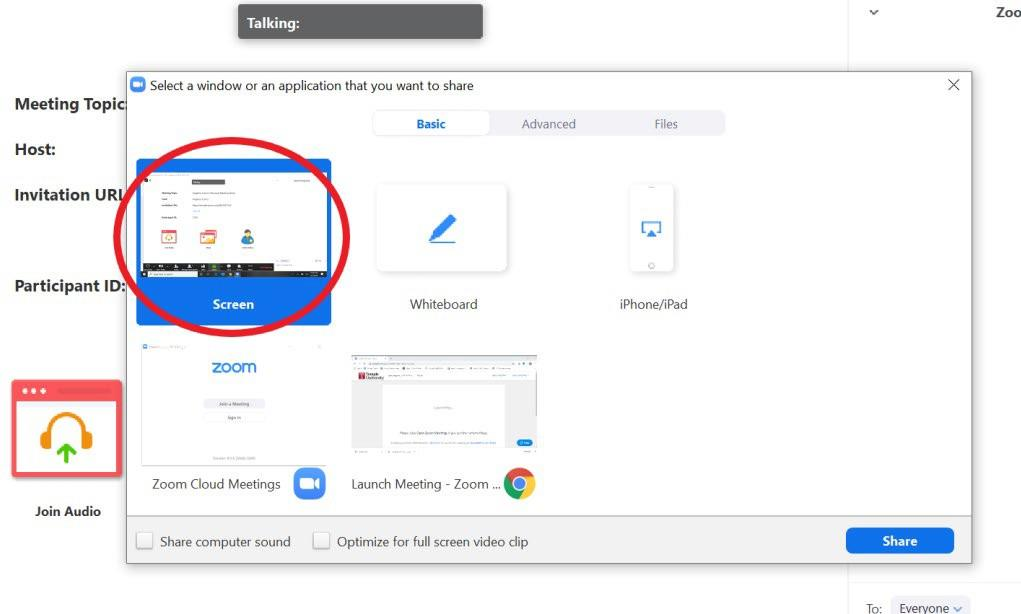
- Select “Share” on the Zoom navigation
- Select the first option “Screen” or “Desktop”

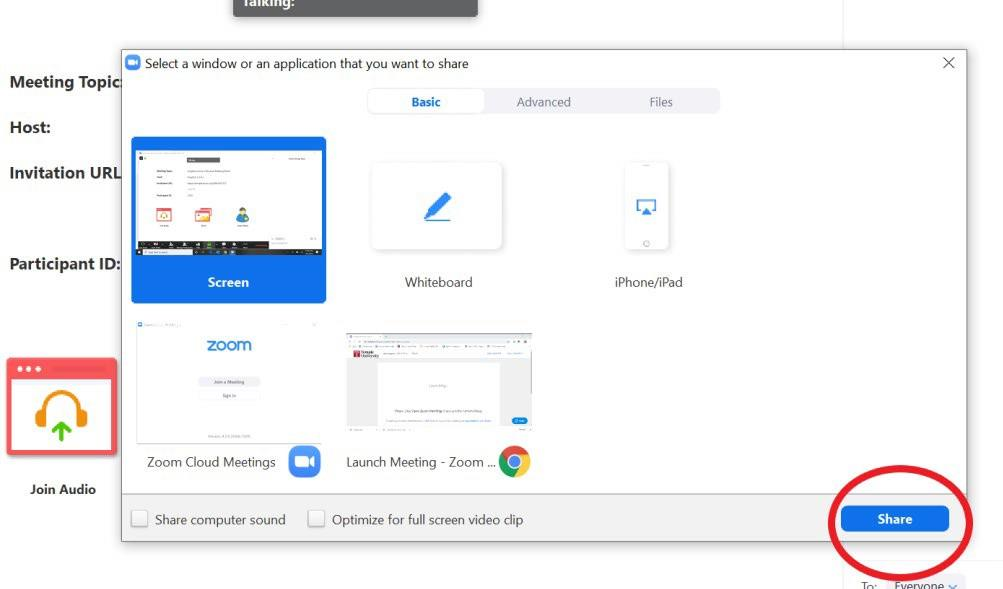
- Select Share

- Open your Exam in a browser
- Click “Record” on the bottom navigation bar
- Select “Record to the cloud” and begin
*Once you press “Record to the cloud” everything that happens in the meeting is being recorded.
- Select “Record to the cloud” and begin
- Once you have finished your exam, click “End Meeting
- The recording will appear under “Recordings” when you log back into Zoom
Submitting your Exam Recording:
- Go to zoom.temple.edu
- Click “Sign in”
- Select “Recordings” on the Zoom navigation (to the left)
- Click the “Topic” link to the session

- Click “Download” to download/save the recording to your computer.
- Once the recording has been saved to your computer as a precaution, click “Copy shareable link”
- Post this link on Canvas under the “Exam Link Submission” assignment
*Please Note: Do not delete your exam recording, otherwise your professor will not be able to view it
If you have any problems or questions, please contact foxzoom@temple.edu