- Select the “Announcements” link from the course Navigation menu
- Select the Add Announcement button.
- Create Announcement:
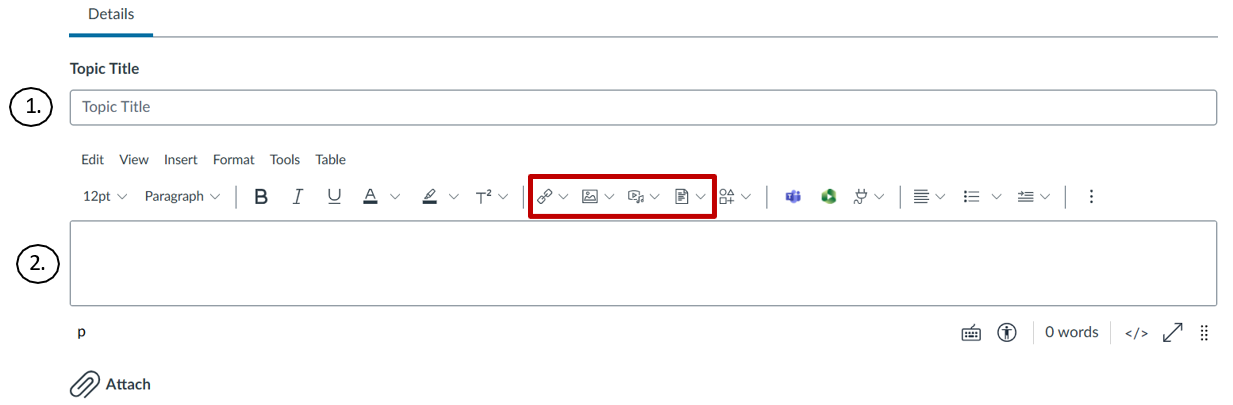
- Type a “Topic Title” for the announcement in the topic title field
- Add content in the Rich Content Editor. You can also add links, files, and images to the announcement using the content bar.
- Select who your announcement will be sent to. By default, Canvas will send your announcement to all sections within your course.
- Select any options and a date if you want to set a time for the announcement to be available “From” and “Until” for your class.
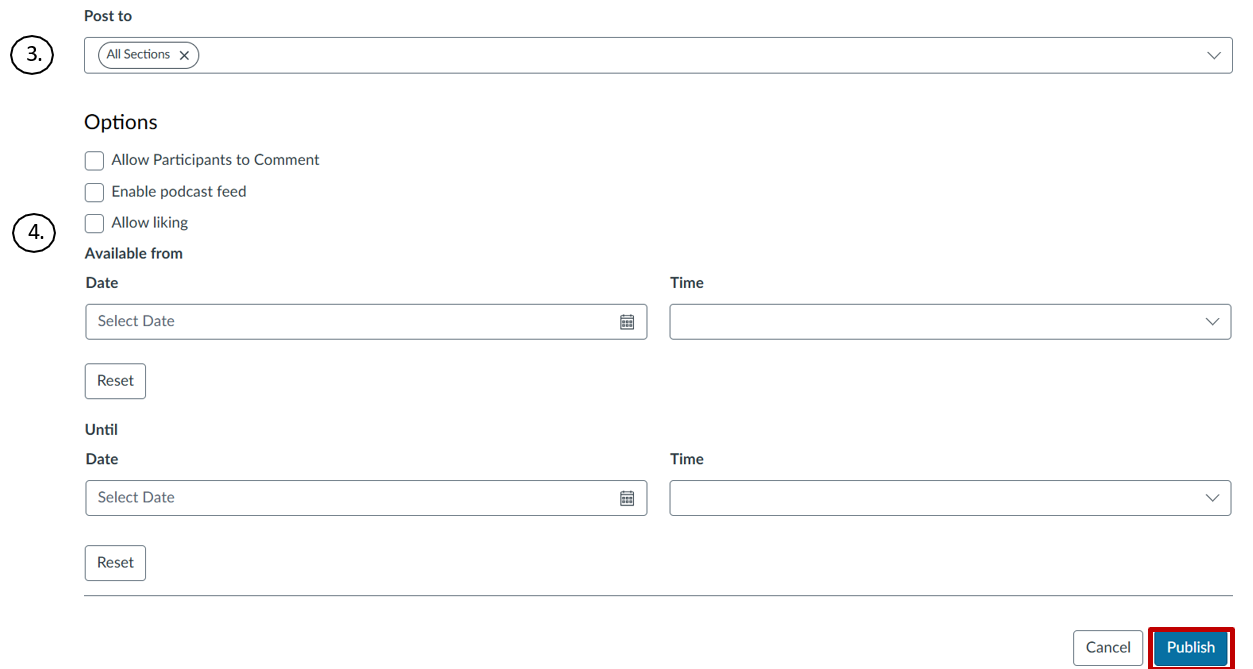
- Otherwise, select “Publish” to post the announcement immediately.
Notes:
- By default, comments are not allowed in announcements unless the Allow Participants to Comment checkbox is selected.
- The Allow Participants to Comment option is persistent, meaning the option you select when creating or editing an announcement will carry over when you create a new announcement in the course.
- Unless you are using the delay posting option in Announcements, once you click Publish, your announcement will immediately be posted in your course.
Download PDF version of this guide