About Qwickly
Qwickly is available for all Temple University Canvas courses, allowing faculty to take attendance within Canvas or enable students to record their attendance using the Check-In feature.
Courses that meet fully online are not required to use Qwickly for attendance tracking.
For any questions or concerns, please contact foxonline@temple.edu
Setting up Qwickly
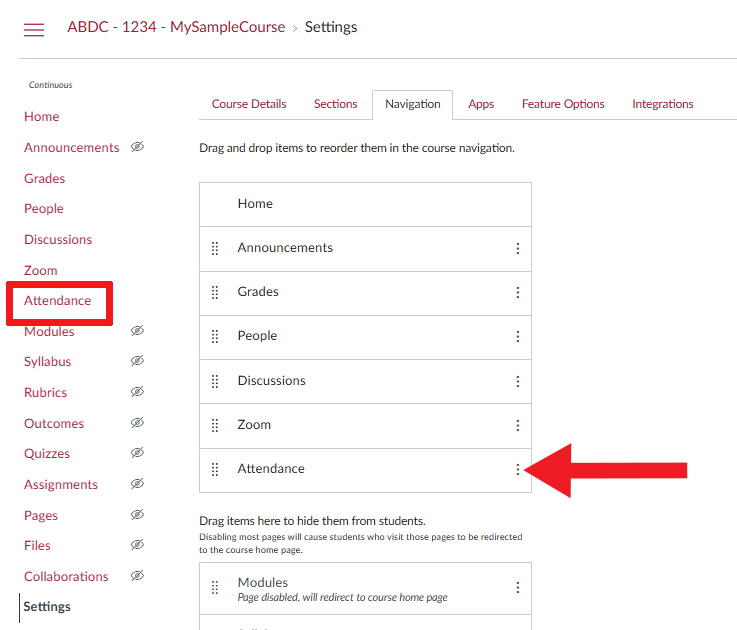
- Locate and select the Attendance link in your Canvas course menu.
- Note: If you do not see the Attendance link in your Canvas course navigation, select Settings.
- Select Navigation from the Settings tabs.
- Drag and drop Attendance above the line that reads “Drag items here to hide them from students.”
- Scroll to the bottom of the page and select “Save.”
- Select Begin Set-Up

- Add settings in the Attendance Settings “Preferences” tab.
- After completion, select the Save Settings button on bottom right.

Note: If you plan to have students check in, select “Check In” as your Default Style. It is recommended to set a Check In Timer within the Check In settings if students are self-checking in. Once the Start check-in option is selected, students will have the specified amount of time to check in, and they will no longer be able to do so once the time expires. You can start the check-in process at any time during your class.
Additionally, consider using a QR code for self-check-in. Live QR codes are dynamic and change every 3-5 seconds, reducing the likelihood of code sharing. This ensures that only those present at the time the code is displayed can use it.

Please keep in mind that it is best practice not to assign points solely for attendance. Instead, encourage students to submit work during class, especially while in Breakout Sessions, to demonstrate their learning.
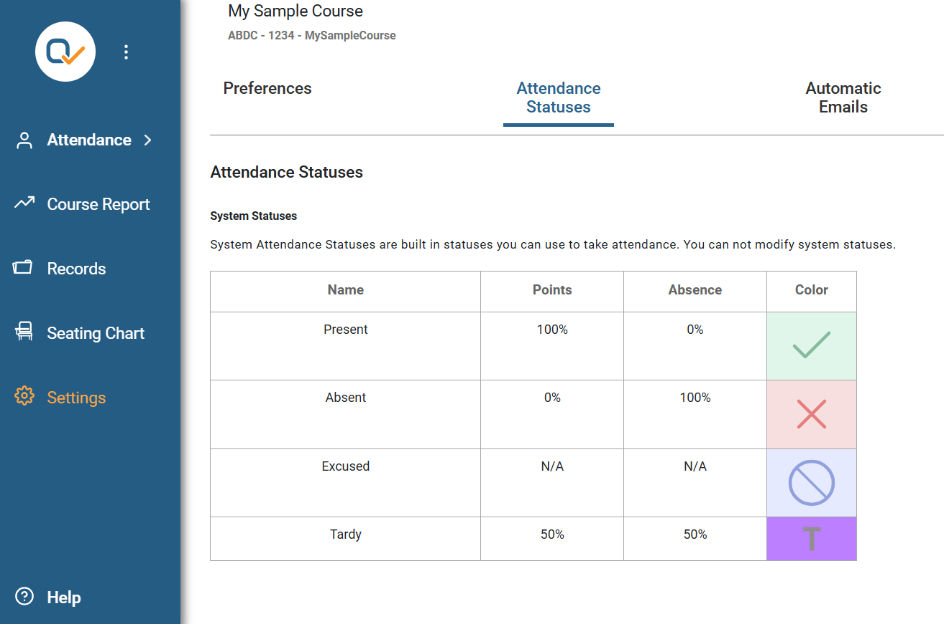
Show Attendance Statuses
The Attendance Statuses tab displays the default statuses include Present, Absent, Excused, and Tardy.
Before Taking Attendance
Before students can verify their attendance using the “Check In” tool, they must first download and install the free Canvas Student App for iOS or Android.
https://community.canvaslms.com/t5/Canvas-Mobile/ct-p/canvas_mobile?tab=recent
If you plan to use the “Check In” option throughout the semester, consider using List View for the first class and instruct students to download the Canvas app for future check-ins. If a student forgets their phone, the instructor can edit the attendance record manually.
Take Attendance in List View
- In the side menu under “Attendance”, select “List”.
- Under Session Information, be sure “Current Time” is selected.
- Under “List”: All students are marked “Present” by default. If a student is Absent, Late, or Excused, their status can be changed.
- On the bottom, select “Submit Attendance” when finished taking attendance.

Note: If there are multiple CRNs enrolled in the Canvas course, select the tab for the “Section” in attendance to view only those students.
Take Attendance via Check-In
- Select the “Attendance” link in the Qwickly course menu.
- Select the “Check-In tab.”
- Select “Start Check In.”
- If the PIN option is selected, the number will appear automatically. After it appears, you can give the PIN to your students so they can check in through the Canvas app.

- Students should open their Canvas app, navigate to the correct course, and select “Attendance.” They can enter the PIN, if required, or select “Check In.”
- End Check In at any time or set a timer to have the check-in automatically stop after the time limit has ended.

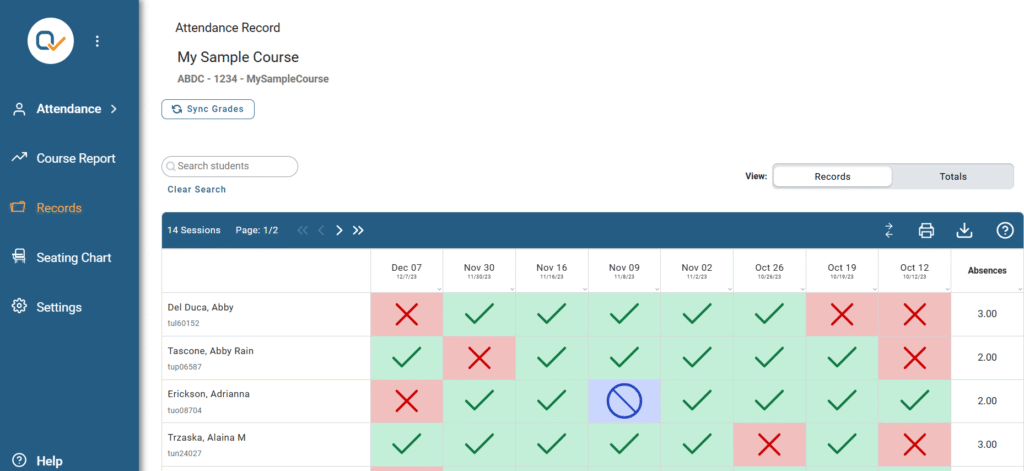
View Attendance Records
- Select the “Attendance” link in the Qwickly course menu.
- Select “Attendance Record.”
- Total absences appear in the far-right column for each student. A CSV file with a complete attendance record can be downloaded.
- Students can see their attendance statistics by selecting “Attendance” from the Canvas course menu.
- Students will see their overall absences at the top and a complete list of all attendance statuses by day.